Your Camera’s Histogram Lies
So how many times have you read (or heard) that you should check your camera’s histogram after each exposure, and that you should adjust your exposure, if necessary, based on the histogram so that you are not ‘clipping’ any highlights or shadows…countless times, right? But did you know that the histogram does NOT accurately represent your image if you’re shooting in RAW?
The histogram you are viewing on your camera’s LCD is based on a Jpeg generated by your camera (and note that the histogram you see will be altered by the camera’s picture control settings*). Even if you set your camera to shoot in RAW, and only RAW, your camera still creates a Jpeg**. That Jpeg is what you are viewing as a preview on the back of your camera. Because the amount of information in a RAW file differs from a Jpeg file, the histogram we see is inaccurate. There is actually more information in the RAW image file than your histogram is telling you. This is one of the reasons shooting in RAW is so awesome- it is much more forgiving than any other format.
A demonstration:
Here, I’ve set the lighting and my exposure so that the camera’s (Red) histogram is starting to clip the highlights (I’ve exaggerated the clipping for display purposes). This image is a grab from my camera’s LCD where I have the Highlight Display activated. The clipping here is displayed in black, often referred to as ‘Blinkies’. BTW- I’ve set my camera to capture in RAW only.
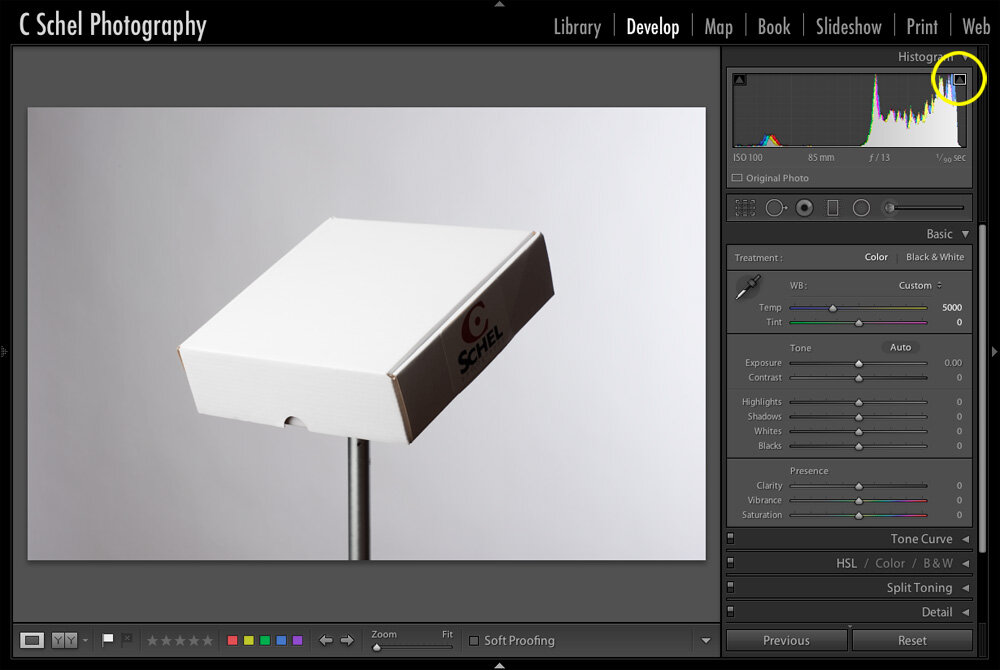
Here is what I see when I import that same file into Adobe Lightroom (I’ve enabled the Show Clipping view option in the program). I have not made any exposure adjustments. Note that there is NO clipping.
Here I’ve turned up the exposure slider until I start to see clipping. The clipping here is represented in red. Note that I’ve added over 2 stops of exposure!
Does this matter?
Well, it may not be a big deal for most images, especially at lower ISOs, but you can achieve a cleaner image (less noise) if you adjust your camera’s exposure to utilize the extra range in the highlights.
This practice is often referred to as ETTR (Expose To The Right).
What ETTR is referring to is exposing your image so that your histogram is weighted to the right- that is, putting the most pixels nearer to the highlights/whites as possible without actually clipping them. Doing this brings more pixels out of the blacks/shadows end of histogram.
Why is this an advantage?
There is typically more noise in shadow/dark areas than in highlight areas (this becomes more important as you increase the ISO of your camera- your images will, of course,have more overall noise with higher ISO settings, but the noise is not uniform- the shadows/blacks will have more noise than the highlights). By capturing an image that looks overexposed, where the histogram is weighted to the right side, but where the highlights have not been clipped (there is still information in those pixels), you can later bring down exposure, or bring down the highlights in your post-processing software (Camera RAW, Lightroom, CaptureOne). By following this method you can achieve the same end result of density/brightness to the image as if you had originally exposed it in camera that way, but with less noise.
And there you have it- your camera lies! But you can out-smart it for better technical results.
*Note- The most accurate camera histogram will be achieved by setting your camera’s picture control to the option with the least amount of contrast (flat).
**Note- There really is no such thing as a ‘RAW’ image. Even in post processing programs like Adobe Lightroom, you can’t actually view in RAW. What you are viewing is a representation of the RAW information in the form of a Jpeg (or potentially Tiff, PSD, etc.).
Postscript- While conducting my demonstration, I discovered that the camera’s histogram, and the camera’s ‘blinkies’, also did not represent the image file accurately even when I had my camera set only for Jpeg format. I found that I was able to add up to about 1.5 stops in Lightroom of a camera Jpeg before I encountered clipping.


