Shooting at 1/4000th of a second… with flash!
Recently I had the opportunity to shoot a young up-and-coming golfer named Taylor Pendrith for SCOREGolf magazine’s 2016 ‘Power’ issue. The creative team at SCOREGolf wanted to show Taylor in his swing, hitting the ball, displaying the incredible power this young man is becoming known for. They also wanted to add a little humor by hinting at his baseball background- hence the bats, balls, and bubble gum!
For this assignment, I wanted to really freeze the motion of Taylor’s club and the ball. For this reason, I knew I’d have to use a pretty high shutter speed. But, I also wanted to shoot with flashunits to create impactful lighting to the image. Hmmmm, what to do?
Typically, when I shoot using a (studio) flash outdoors, I’ll manually set my shutter speed to 1/250th of a second. That’s because 1/250th is the maximum recommended shutter speed to use to sync with non-TTL flash for my camera (Nikon D810). But shooting at 1/250th is not fast enough to freeze the motion I was shooting, not nearly. The solution: use the Hypersync function of my Pocket Wizard wireless transmitter. This changes everything (albeit with some compromises). With the Pocket Wizard’s Hyper Sync function, you can adjust the sync point (the signal when the flash is to fire during an exposure) of the transmitter using software. This allows the ability to sync one’s flash at MUCH higher speeds than what was previously possible.
I did some tests (prior to the day of the shoot) of someone swinging a golf club. From these test I decided a shutter speed of 1/4000th was what I needed to freeze the club and ball (there is actually still a slight blur at this speed, but I was satisfied with this result).
I then shot some tests to see how the flash would look synced at 1/4000th. From these tests I found that I could shoot up to 1/750th without any major sync issues, but anything higher than that speed and the flash was ‘cut-off’ on one side of the frame by the camera’s curtain (shutter). This cut-off got worse as the shutter speed was set higher. However, even with this ‘cut-off’ issue, I eventually decided to use 1/4000th as my shutter speed for the shot because: A) This would freeze the movement of club and ball, which I really wanted to achieve, and B) I had a plan to fix the cut-off issue in post.
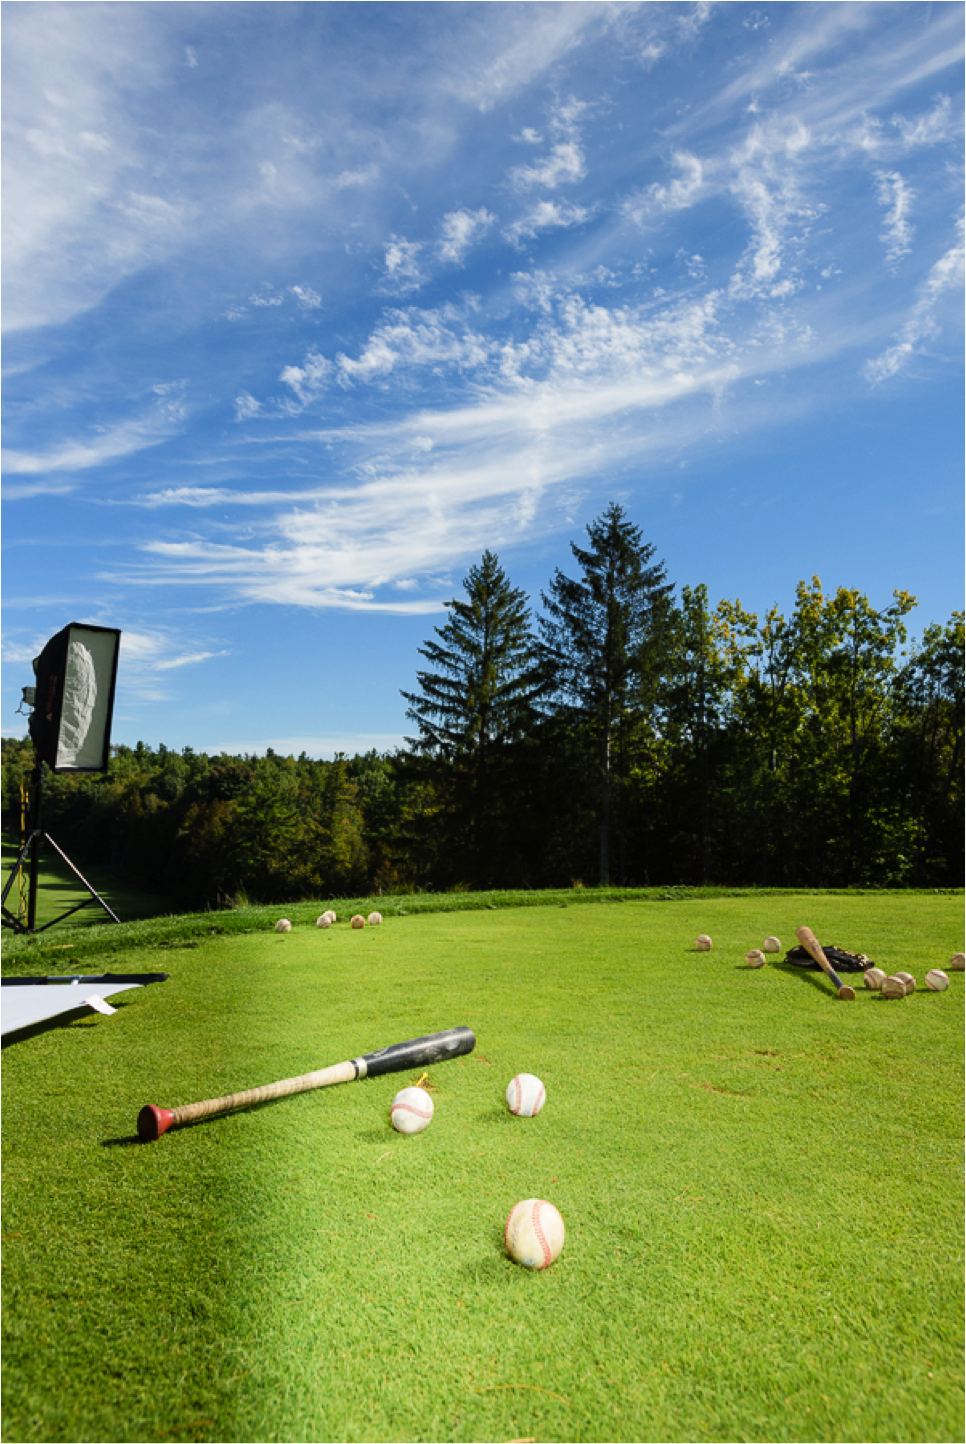
If you look at the image on the right, you can see how the main flash (which was placed next to my camera) doesn’t appear to illuminate the left side of the grass. This is a deception- the flash did, indeed, illuminate the grass, but because the shutter’s curtain cut off the light coming from the flash (I’m shooting at 1/4000th, don’t forget) the camera isn’t capturing that light. On the left side of the frame we see the grass illuminated only by the existing daylight. If you notice, you don’t see this difference in the distance, and that’s because the flash isn’t illuminating anything that far away, or at least, isn’t near strong enough to be recorded by the camera at my settings.
Below is the main frame that was used to create the final image (the grass has yet to be addressed). Note that the flash/softbox that we see in background on the left doesn’t look like it fired, but it DID fire. We don’t actually see the softbox lit up, however, we DO see the light from it … it’s highlighting Taylor’s right side. You may notice that Taylor is a little small in the frame-that was intentional. It’s because I wanted to make sure he didn’t fall on the ‘cut-off’ line I spoke of earlier.
Below is the frame I used for the grass/foreground. I needed a frame where the grass/foreground wasn’t blown out. I simply shot a frame once we were finished with Taylor without firing my flashes. Note that because I shot that image later, shadows crept onto the area I was shooting. Thankfully I only needed the foreground of that image. In hindsight, I should have shot this frame earlier in the shoot.
Here is the final image:
1/4000th of a sec @ f/8, 1600 ISO
I turned up the Clarity in Lightroom to give the image some grit, and gave it a bit of a Dutch Tilt to make it a little more dynamic. I also actually switched the sky from another image that was shot later because I thought the clouds worked better (see image I used for grass/foreground). Switching the sky was easy, as the camera was on a tripod and didn’t move for the series of shots. A sharp eye will also see that the ball in the final image is in a slightly different position relative to the club head….ahh, the Magic of Photoshop.
Here is a Behind the Scenes video of the shoot that SCOREGolf produced:


